02 Project Groups, Folders and Libraries
< Back to 01 Introduction and Getting Connected
- 1. Choose a name for your project
- 2. Create custom groups
- 3. Add users to custom groups
- 4. Create SAS Viya folders
- 5. Set permissions on folders
- 6. Create filesystem directories
1. Choose a name for your project
-
In Remote Desktop Manager, in an SSH session connected to
serveras cloud-user, set a value for the project_name.Tip: Whenever you see instructions that tell you to run some commands, you should always run them in Remote Desktop Manager, in an SSH session connected to
serveras cloud-user. We won’t repeat this every time.Here are some examples you can choose if you don’t want to make up your own:
# Choose a project_name, and store it in an environment variable. You can # choose your own project_name, or choose ONE of these suggestions: export project_name="FANS" # export project_name="Ares" # export project_name="Aurora" # export project_name="Borealis" # export project_name="NDC" # Nordic Decision Confidence # Save the project name in lowercase in another environment variable project_name_lowercase=$(echo ${project_name} | awk '{print tolower($0)}') # Save a four-letter abbreviation of the project name for use in libnames project_name_short=${project_name_lowercase::4} -
Then run this to authenticate against the sas-viya CLI as a SAS administrator:
# Authenticate as sasadm
sas-viya auth login -u sasadm -p Student1
IMPORTANT: From here on, run bash commands like the ones above in Remote Desktop Manager, in an SSH session connected to
serveras cloud-user.The instructions will not keep repeating this.
2. Create custom groups
Create custom groups for:
- Project team members which include...
- Project content administrators
- Project power users
-
If you do not already have the SASViyaLinks page open in your browser, you can open it by double-clicking this shortcut on the Windows desktop of your lab environment:

-
In the SASViyaLinks page, click the link for SAS Environment Manager. It’s at the top of the list.
-
Sign in to SAS Environment Manager as user ID sasadm, password Student1:

-
Opt in to the SASAdministrators assumable group:
Note: Throughout the rest of this activity, whenever you are prompted to, please opt in to the SAS Administrators assumable group. We will usually not mention this, we will assume you have opted in to it.
-
Navigate to the Users and Groups page.
Tip: You can click the ‘>>’ button at the bottom of the navigation bar in SAS Environment Manager to expand the navigation bar, revealing the page names:
 →
→ 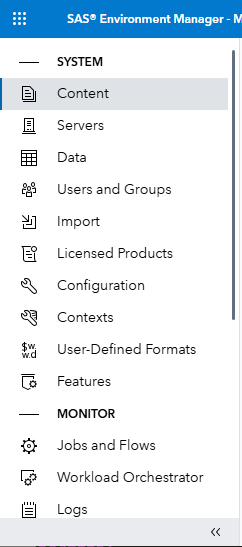
You can then click the ‘<<’ button to hide the page names.
-
Create a new custom group with the name “FANS” and the ID “fans”, and description “FANS project team members”.
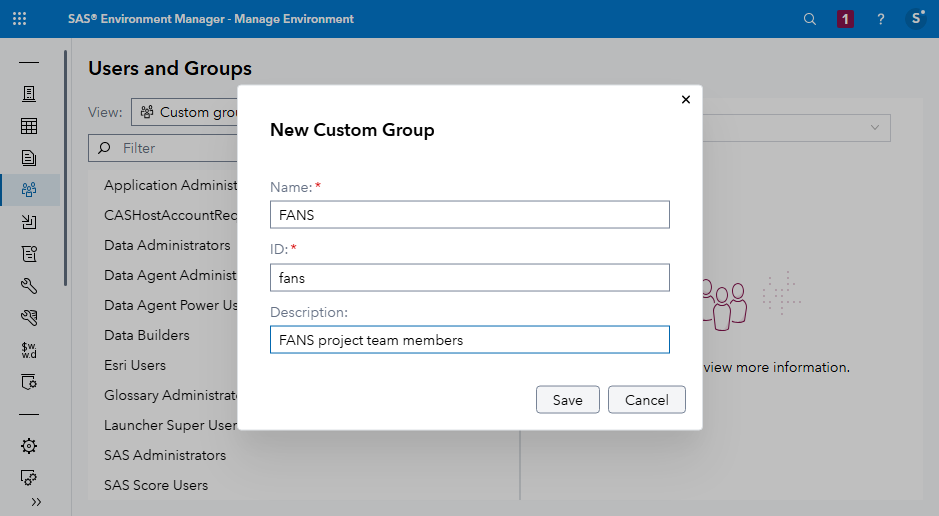
Or alternatively run this to create that group:
# Uncomment and run this to list custom groups # sas-viya --output text identities list-groups --providerId "local" # Create a new custom group for your project sas-viya identities create-group --name "${project_name}" --id "${project_name_lowercase}" --description "${project_name} project team members" -
Create another two custom groups, by running these two commands:
sas-viya identities create-group --name "${project_name} Content Administrators" --id "${project_name_lowercase}_content_admins" --description "${project_name} content administrators"
sas-viya identities create-group --name "${project_name} Power Users" --id "${project_name_lowercase}_power_users" --description "${project_name} power users"
3. Add users to custom groups
Put at least one user in each custom group, using EV and the sas-viya CLI.
For example:
- Fernanda, Fiona, Frank and Fred, could all be project team members for the FANS project
- Fernanda could be a project content administrator
- Frank could be a project power user
You can choose other users in other combinations for your project, but you should put at least one user in each of these custom groups.
-
In SAS Environment Manager, still on the Users and Groups page, click the Edit button to edit the members of your custom group for all project team members.

-
Add users to your custom group, e.g. Fernanda, Fiona, Frank and Fred:
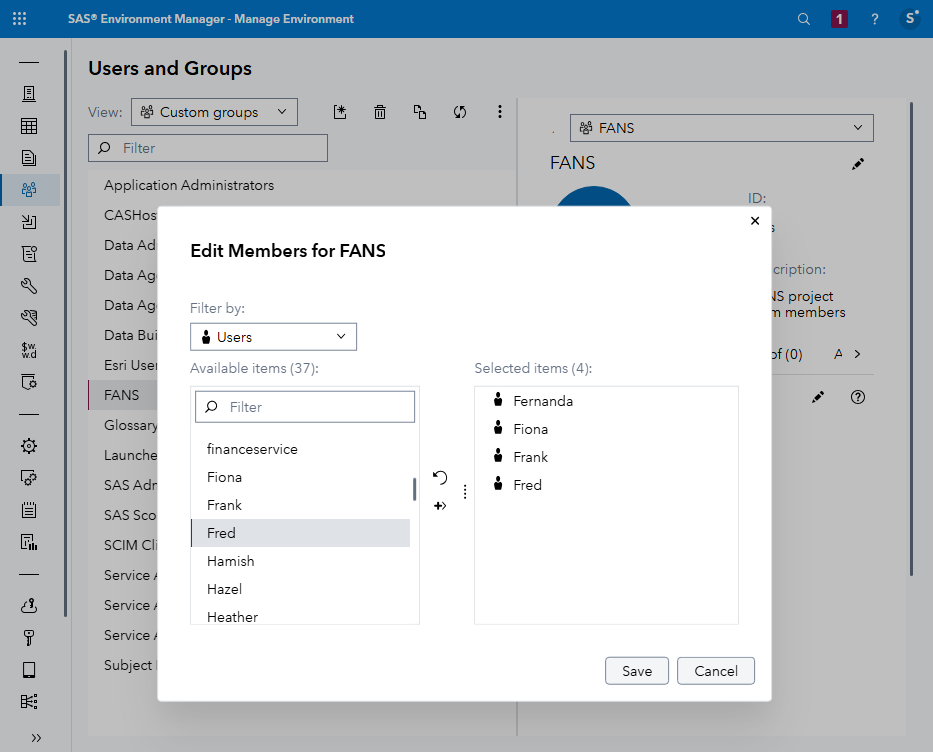
Or alternatively run this to add those four users to that group:
# Add Fernanda, Fiona, Frank and Fred to the project team members group
sas-viya identities add-member --group-id "${project_name_lowercase}" --user-member-id "fernanda"
sas-viya identities add-member --group-id "${project_name_lowercase}" --user-member-id "fiona"
sas-viya identities add-member --group-id "${project_name_lowercase}" --user-member-id "frank"
sas-viya identities add-member --group-id "${project_name_lowercase}" --user-member-id "fred"
Note: If you try to add users to a group when they are already a member of that group, you would see an error message something like this:
The following errors have occurred: Membership between the group "fans" and the identity "fernanda" already exists. Http Status: 409 ErrorCode: 10550 Details: path: /identities/groups/fans/userMembers/fernanda -
Put users in the content administrator and power user custom groups:
# Make Fernanda a project content administrator sas-viya identities add-member --group-id "${project_name_lowercase}_content_admins" --user-member-id "fernanda" # Make Frank a project power user sas-viya identities add-member --group-id "${project_name_lowercase}_power_users" --user-member-id "frank"Note: A reminder that the password for Fernanda, Fiona, Frank, Fred and most other accounts in this environment is Student1
-
In SAS Environment Manager, still on the Users and Groups page, click the Refresh button 🗘 in the button bar above the list of identities, and verify that you can see the three new custom groups.
-
Select each of the new project custom groups, to see their members. Are the right users in the right groups?
4. Create SAS Viya folders
- Top-level folder for project
- Folders for some of:
- formats
- input data
- prepared data
- analysis
- output delivery
Q: Save paths in more environment variables to use later?
- In SAS Environment Manager, navigate to the Content page.
- Navigate into the SAS Content folder.
-
In the SAS Content folder, create a new folder whose name is your project’s name, e.g. FANS.
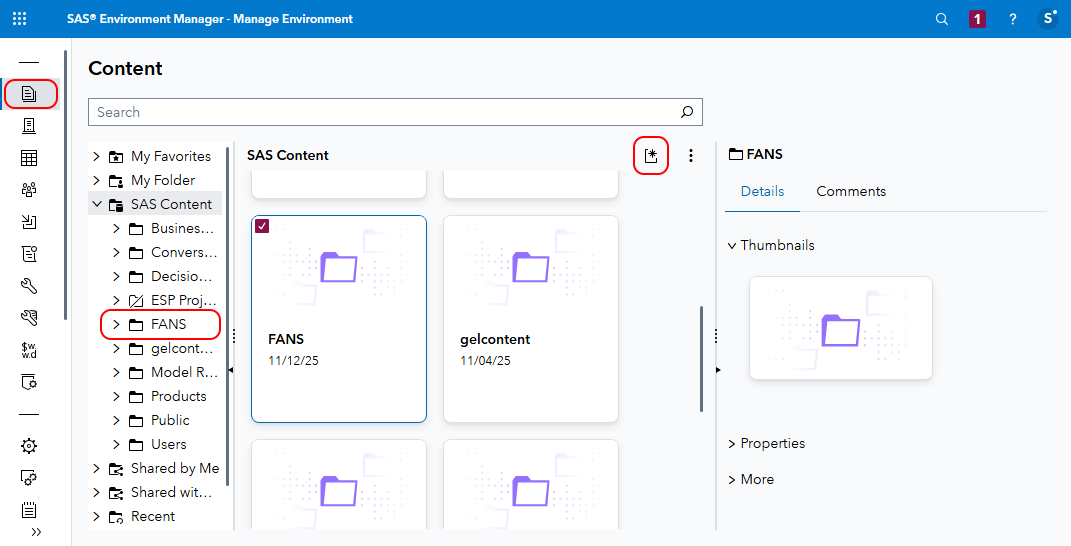
Or alternatively run this to create that folder:
# Create the top-level project folder. By not specifying a parent folder id or path, it is created under SAS Content. sas-viya folders create --name "${project_name}" -
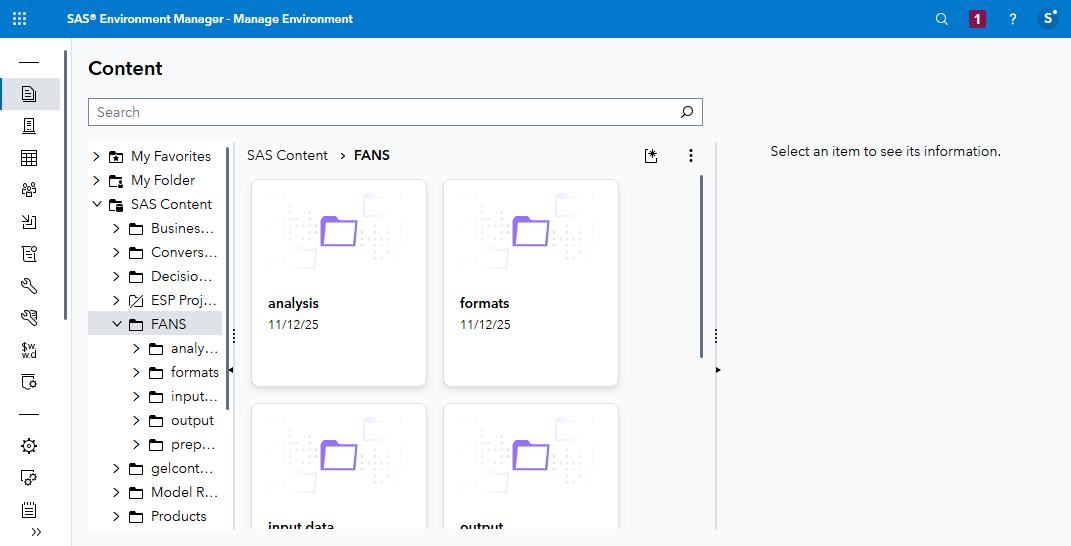
Create sub folders:
# Create a folder for project formats sas-viya folders create --name "formats" --parent-path "/${project_name}" # Create a folder for project input data sas-viya folders create --name "input data" --parent-path "/${project_name}" # Create a folder for project prepared data sas-viya folders create --name "prepared data" --parent-path "/${project_name}" # Create a folder for project analysis sas-viya folders create --name "analysis" --parent-path "/${project_name}" # Create a folder for project output sas-viya folders create --name "output" --parent-path "/${project_name}"Note: We will use some of these folders later, and the rest are just an idea for what you might choose to create.
-
In SAS Environment Manager, still on the Content page, navigate into your project folder to see the subfolders inside it:
5. Set permissions on folders
At this point, the user who created these SAS Viya folders (sasadm) is the only user who can see them. Authenticated Users has no permissions granted on any of these folders or their contents.
Grant permissions to:
- Give all project team members read access to the project folder structure and everything inside it
- Give project content administrators write access to everything in the project folder structure
No special folder permissions are granted to power users.
-
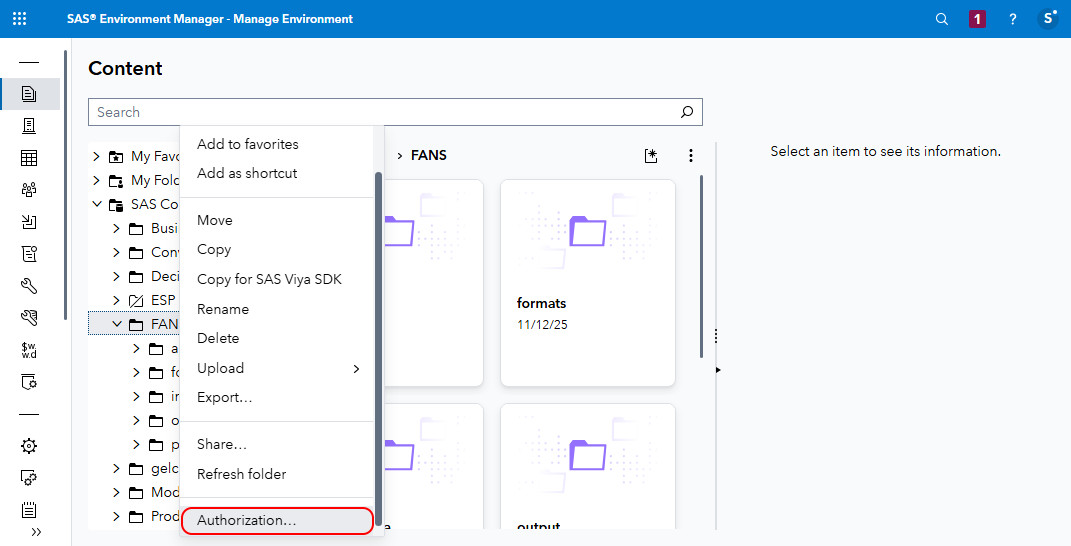
In SAS Environment Manager, still in the Content page, navigate up (if necessary) to see the contents of the SAS Content folder, right-click on the project folder, e.g. FANS (or the name you chose for your project), and choose Authorization...:
Tip: You may have to scroll down to see Authorization..., which is at the bottom of the popup menu.
-
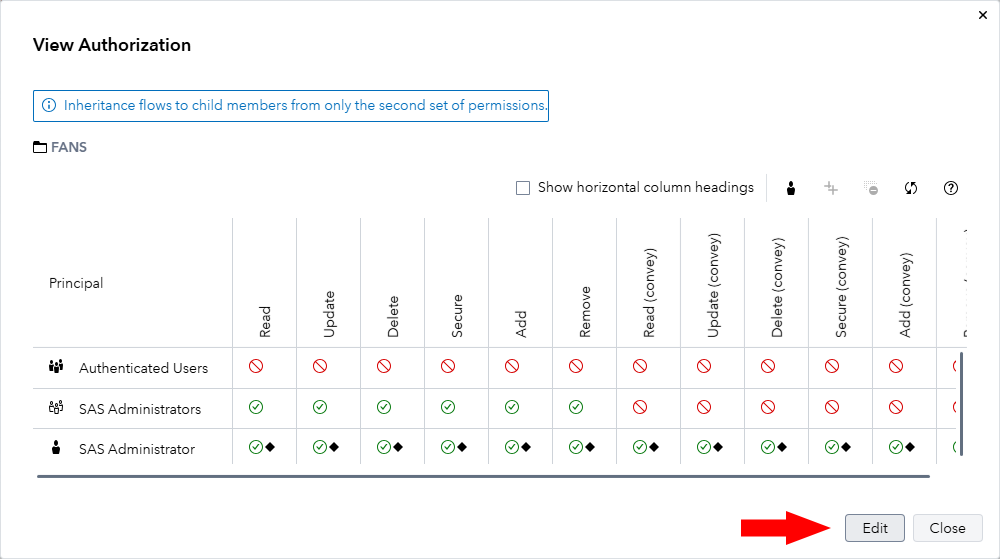
In the View Authorization dialog, click the Edit button, bottom right:
-
In the Edit Authorization dialog, click the ‘Add identities’ button:
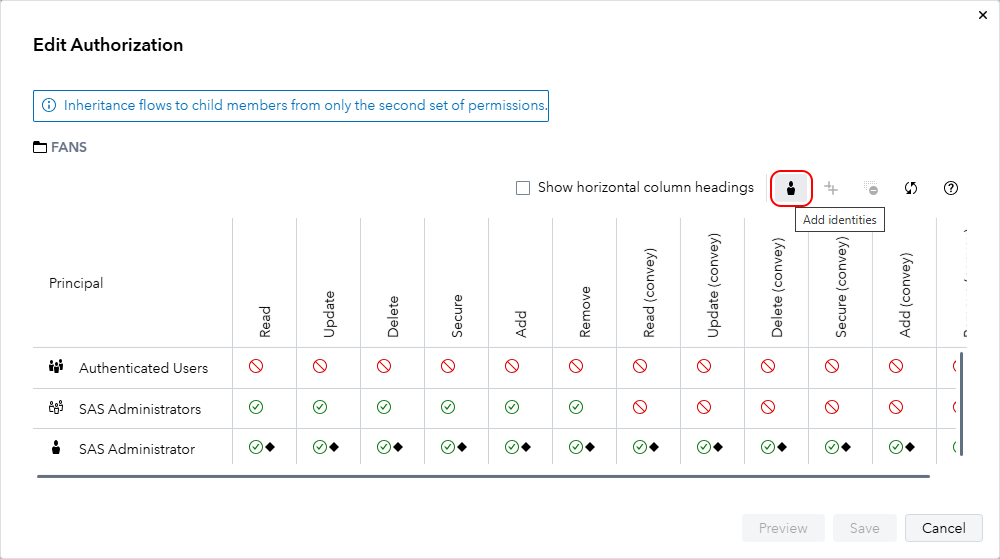
-
In the Add Identities dialog select your project team members custom group, e.g. FANS, and click OK.
-
Grant members of this group Read and Read (convey) permissions on the top-level project folder:
_on_FANS_folder.png)
Note: The Read (convey) permission is also granted in the screenshot above, but it is covered by the popup dialog.
-
In the Edit Authorization dialog, click Save.
The Edit Authorization dialog closes.
Alternatively, you could run the commands below to grant the same permissions. The first command finds the Uniform Resource Indicators (URIs) for the folder (and its container). The second command, split over several lines here to make it more readable, calls the sas-viya authorization plugin to grant the desired permissions:
Note: Skip this if you just granted FANS group members Read and Read (convey) permissions in SAS Environment Manager. This does the same thing - no need to do it twice.
# Get the object-uri and container-uri for the top-level project folder object_uri="$(sas-viya folders show --path "/${project_name}" | jq -r ".id")" # Grant project team members read and read (convey) on the top-level project folder sas-viya authorization grant \ --group "${project_name_lowercase}" \ --permissions read \ --object-uri /folders/folders/${object_uri}/** \ --container-uri /folders/folders/${object_uri} \ --reason "Project team members can access the folder" -
Grant project content administrators write access to everything in the project folder structure:
Note: This is new; you have not done this before.
# Get the object-uri and container-uri for the top-level project folder
object_uri="$(sas-viya folders show --path "/${project_name}" | jq -r ".id")"

# Grant project content administrators write access to everything inside the top-level project folder
sas-viya authorization grant \
  --group "${project_name_lowercase}_content_admins" \
  --permissions read,add,remove \
  --object-uri /folders/folders/${object_uri}/** \
  --reason "Project content administrators can add and remove things from the project folder"
sas-viya authorization grant \
  --group "${project_name_lowercase}_content_admins" \
  --permissions read,update,delete,add,remove \
  --container-uri /folders/folders/${object_uri} \
  --reason "Project content administrators can modify anything inside the project folder"
Expected output (twice); a JSON representation of each new authorization rule, then:
The authorization rule has been created. -
In SAS Environment Manager, still on the Content page, right-click the project folder (e.g. FANS) and choose Authorization... again.
-
See that the new grants for your project Content Administrators are visible in the authorization grid:
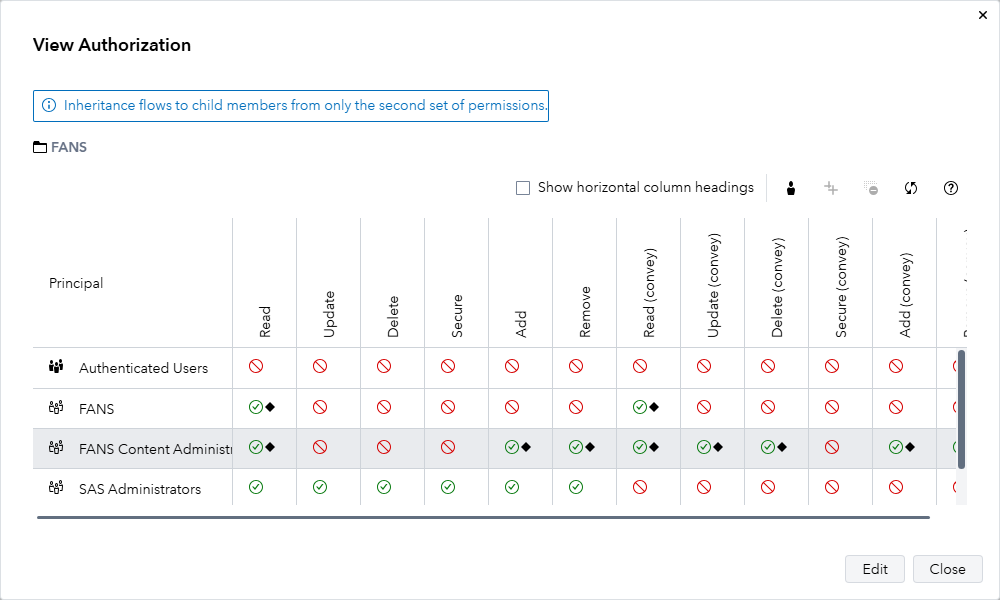
If everything worked, our simple authorization model design is that:
- All members of the project group (e.g. FANS) have been granted Read and Read (convey) on the top-level project folder (e.g. FANS)
- Members of the project content admins group (e.g. FANS Content Administrators) have been granted Read, Add and Remove permissions on the top-level project folder, and Read (convey), Update (convey), Delete (convey), Add (convey), and Remove (convey) on the FANS folder, meaning they will have all of those permissions on all content within the folder.
Note: It is not really necessary to grant the members of the project content admins group Read or Read (convey) on the project folder (e.g. FANS), because they are also supposed to be members of the general project group and would get both Read permissions by virtue of that membership. It is up to you whether you think it would be more obvious to other users to grant the Read permissions to both groups, or only the larger, more general group.
6. Create filesystem directories
Create 3 filesystem directories for project data:
- Raw input in some non-SAS format e.g. CSV
- Processed input as CAS tables
- Output as CAS tables (or something else).
The /workshop/gelcontent directory on the server is shared via an NFS file share and is mounted into the SAS Viya compute and CAS pods as /gelcontent.
We are not reviewing how this has been set up in this activity; you can learn about it in our SAS Viya Administration Operations course. But it provides a convenient place for us to create a new directory structure to hold your project data.
Note: We should secure the directory structure with a carefully-designed authorization model. For this hands-on activity, we will just make it fully read and writeable to all users.
-
Create a directory structure on the server under /workshop/gelcontent:
# Create top-level filesystem directory for the project mkdir -p /workshop/gelcontent/${project_name_lowercase} # Create subdirectories for project data mkdir -p /workshop/gelcontent/${project_name_lowercase}/input mkdir -p /workshop/gelcontent/${project_name_lowercase}/prepared mkdir -p /workshop/gelcontent/${project_name_lowercase}/output -
In your web browser with SAS Environment Manager still open, signed in as sasadm, click on the SAS Viya application menu, and choose Develop Code and Flows to open SAS Studio.
-
Wait for the compute session to start in the SAS Studio compute context.
Tip: You can tell when your compute session has started when there is no longer a circular blue ‘working’ icon displayed next to the ‘SAS Studio compute context’ dropdown menu top right, and the Run button is enabled in a SAS Program window.
-
For the next step, it is not necessary for you to run any SAS code, all you need is to have a running compute session. Switch back to your SSH terminal session in Remote Desktop Manager.
-
While your compute session is still running in SAS Studio, run this from the SSH session in Remote Desktop Manager. It will exec into the sas-programming-runtime container in the SAS compute server pod started to run your new compute session, start a bash shell, and run an ls command in that shell to list the /gelcontent directory mounted in the sas-programming-runtime container in that pod:
kubectl exec -it \
  $(kubectl get pod \
      -l launcher.sas.com/requested-by-client=sas.studio,launcher.sas.com/username=sasadm \
      --output=jsonpath={.items..metadata.name}) \
      -c "sas-programming-environment" \
      -- bash \
      -c "ls -al /gelcontent"
Expected output (when the project name in lowercase is ‘fans’):
total 28
drwxrwxrwx+ 7 sas  2003 4096 Oct 28 14:05 .
drwxr-xr-x  1 root root 4096 Oct 28 13:44 ..
drwxrwxrwx  9 1004 1004 4096 Oct 27 16:26 educorp_initenv
drwxrwxrwx+ 2 1004 1004 4096 Oct 28 14:05 fans
drwxrwxrwx+ 2 root root 4096 Oct  7  2020 formats
drwxrwsrwx+ 7 sas  2003 4096 Mar 22  2020 gelcorp
drwxr-xr-x+ 2 root root 4096 Oct  7  2020 home
This shows that project directory you just created on the server, fans in the example above, is visible inside the pod. It should have today’s date as its last modified date.
-
Similarly, exec into the SAS compute server pod’s sas-programming-runtime container and list the content of the newly-created project directory (e.g.
/gelcontent/fans):kubectl exec -it \ $(kubectl get pod \ -l launcher.sas.com/requested-by-client=sas.studio,launcher.sas.com/username=sasadm \ --output=jsonpath={.items..metadata.name}) \ -c "sas-programming-environment" \ -- bash \ -c "ls -al /gelcontent/${project_name_lowercase}"Expected output - the subdirectories we created on the server are shared and mounted inside the compute server pod, and are accessible to SAS programs:
total 20 drwxrwxrwx+ 5 1004 1004 4096 Oct 28 14:15 . drwxrwxrwx+ 7 sas 2003 4096 Oct 28 14:05 .. drwxrwxrwx+ 2 1004 1004 4096 Oct 28 14:15 input drwxrwxrwx+ 2 1004 1004 4096 Oct 28 14:15 output drwxrwxrwx+ 2 1004 1004 4096 Oct 28 14:15 prepared -
The same directories are made available inside the CAS pod thanks to the same NFS file share:
_CASControllerPodName=$(kubectl get pod \
                          --selector "casoperator.sas.com/server==default,casoperator.sas.com/node-type==controller,casoperator.sas.com/controller-index==0" \
                          --no-headers \
  | awk '{printf $1}')

echo ${_CASControllerPodName}

kubectl exec -it \
 ${_CASControllerPodName} \
      -c "sas-cas-server" \
      -- bash \
      -c "ls -al /gelcontent/${project_name_lowercase}"
Expected output - the subdirectories we created on the server are shared and mounted inside the CAS controller pod, and are accessible to CAS:
total 20
drwxrwxrwx+ 5 1004 1004 4096 Oct 28 14:15 .
drwxrwxrwx+ 7 sas  2003 4096 Oct 28 14:05 ..
drwxrwxrwx+ 2 1004 1004 4096 Oct 28 14:15 input
drwxrwxrwx+ 2 1004 1004 4096 Oct 28 14:15 output
drwxrwxrwx+ 2 1004 1004 4096 Oct 28 14:15 prepared
Again, we are not reviewing how this has been set up in this activity; you can learn about it in our SAS Viya Administration Operations course.
-
Download an 891-row dataset of data about the Titanic disaster, and store it in the project input directory:
cd /workshop/gelcontent/${project_name_lowercase}/input
wget -O titanic.csv "https://raw.githubusercontent.com/datasciencedojo/datasets/refs/heads/master/titanic.csv"
cd -
We will use this CSV file later, in another activity.
Continue to 03 CAS Libraries and Formats